
How To Flash A Keyboard
Overview
In this guide you will learn the ins and outs of flashing a keyboard using the QMK configurator. QMK is an open-source project and is really the cornerstone of the hobbyist keyboard community. Whereas “big brand” keyboards (think Corsair, Razer, etc.) ship with their own proprietary software to map keys, setup macros, and change lighting, that is a gargantuan task for your average keyboard-creator and maker. QMK offers the community a great way to centralize keyboard mapping and flashing, and the entire community has QMK to thank for so much. Additionally, the team behind QMK does an absolutely amazing job of reviewing what is included in QMK and that results in an incredibly fluid experience using it, where frustration is low, and things just work. I love QMK.
When you’re first starting out in the hobby, flashing a keyboard via QMK is a tiny bit intimidating, for some reason the words “flashing” and “keymaps” and just the acronym QMK alongside the jargon “Configurator” and “Toolbox” can be a bit much. However, trust me, when you break it down it’s quite simple, and after you do it once it will literally take you mere moments to flash keyboards from that point on. Furthermore, you will soon find that QMK offers FAR MORE options compared to other proprietary software shipped with big-box store keyboards. In fact, the features of QMK and what it allows you to do with your keyboard is really the main reason so many people want to use a custom keyboard. It’s not just about looks, it’s about the increased functionality and productivity the customization offers you.
In order to help you get a thorough understanding of the process of flashing a keyboard, I am going to outline some key terms you may have heard already heard or will definitely hear throughout the community.
Common Terms
QMK: An open-source project that allows creators to submit their keyboard into the project so that users/customers may use the QMK ecosystem to flash their keymaps to the keyboard and customize it as they see fit.
Keymap: A keymap is a file (code) that maps your physical keystrokes to an input. The keymap, hence the inclusion of the word map, tells your computer which key does what. Whether that is a simple key like the letter “A” or a more complex Macro or function key, it is included in the Keymap. Keymaps are sometimes referred to as a “Hex file” or a “.hex” because the file-type of a Keymap is “.hex,” ex. (“sick_keymap.hex”).
QMK Configurator: A web-based application that allows you to create a Keymap in a visual way using Drag and Drop tiles (symbolizing keys), with pre-set Keymaps available for any keyboard in QMK. The QMK Configurator allows you to create a keymap without writing any code, and then simply hit a button to produce a completed (compiled) .hex file.
Flashing: The process of putting a piece of software onto a piece of hardware. In the world of keyboards, flashing simply means putting your Keymap (the .hex file produced by the QMK Configurator) onto the Micro Controller (generally a Pro Micro or Elite-C).
QMK Toolbox: A desktop application that allows you to take your Keymap (.hex file) produced by QMK Configurator and then flash it onto your keyboard.
With knowledge of what those terms mean and what they are referring to, you’re now ready to move onto actually creating a Keymap and flashing your board!
Step 1: Create Your Keymap (Part A)
The first step of flashing a keyboard is to create and download a Keymap (.hex file). Remember, the keymap is produced by the QMK Configurator so let’s head over there. The URL for the QMK Configurator is QMK Configurator.
You will see something similar to this, but depending on when you view the website in relation to when this article was written, it is possible it looks islightly different.
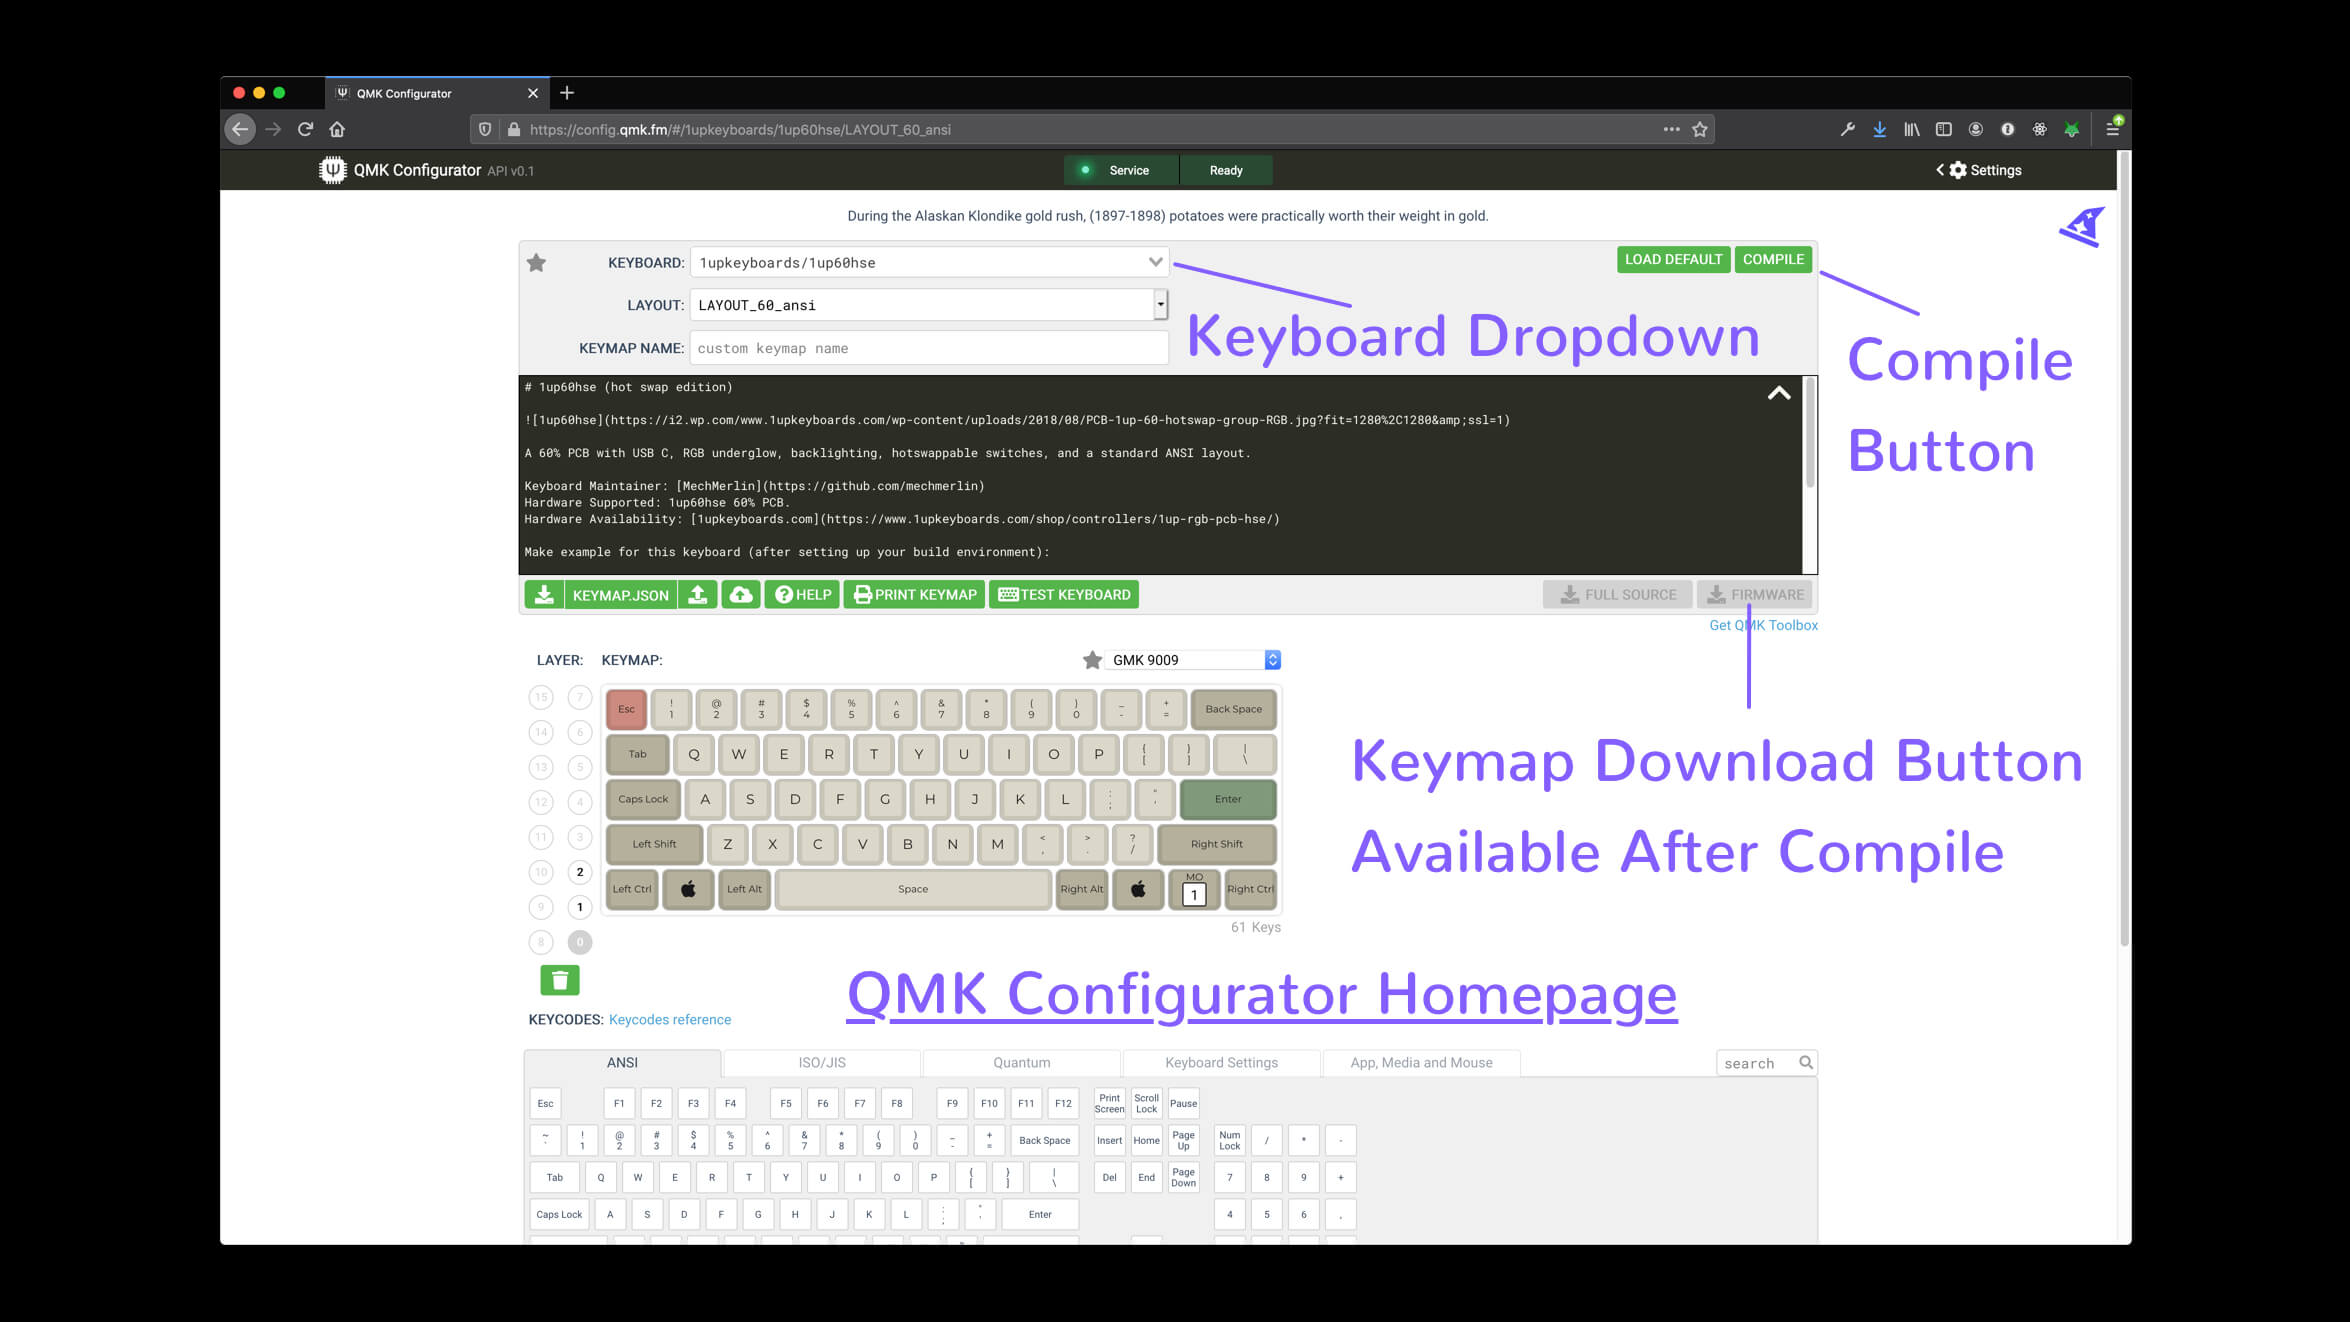
For the purpose of this guide, we will pretend we are flashing a 3x4 Macro Pad By Boardsource. In order to create the correct keymap for the board we are working on, we need to select it from the dropdown list shown in the photo below.
All Boardsource boards that do not overlap with an existing keymap will be listed under “boardsource/NAMEOFBOARD,” so the 3x4 Macro Pad is listed under “boardsource/3x4.”
![qmk configurator keyboard selection dropdown]()
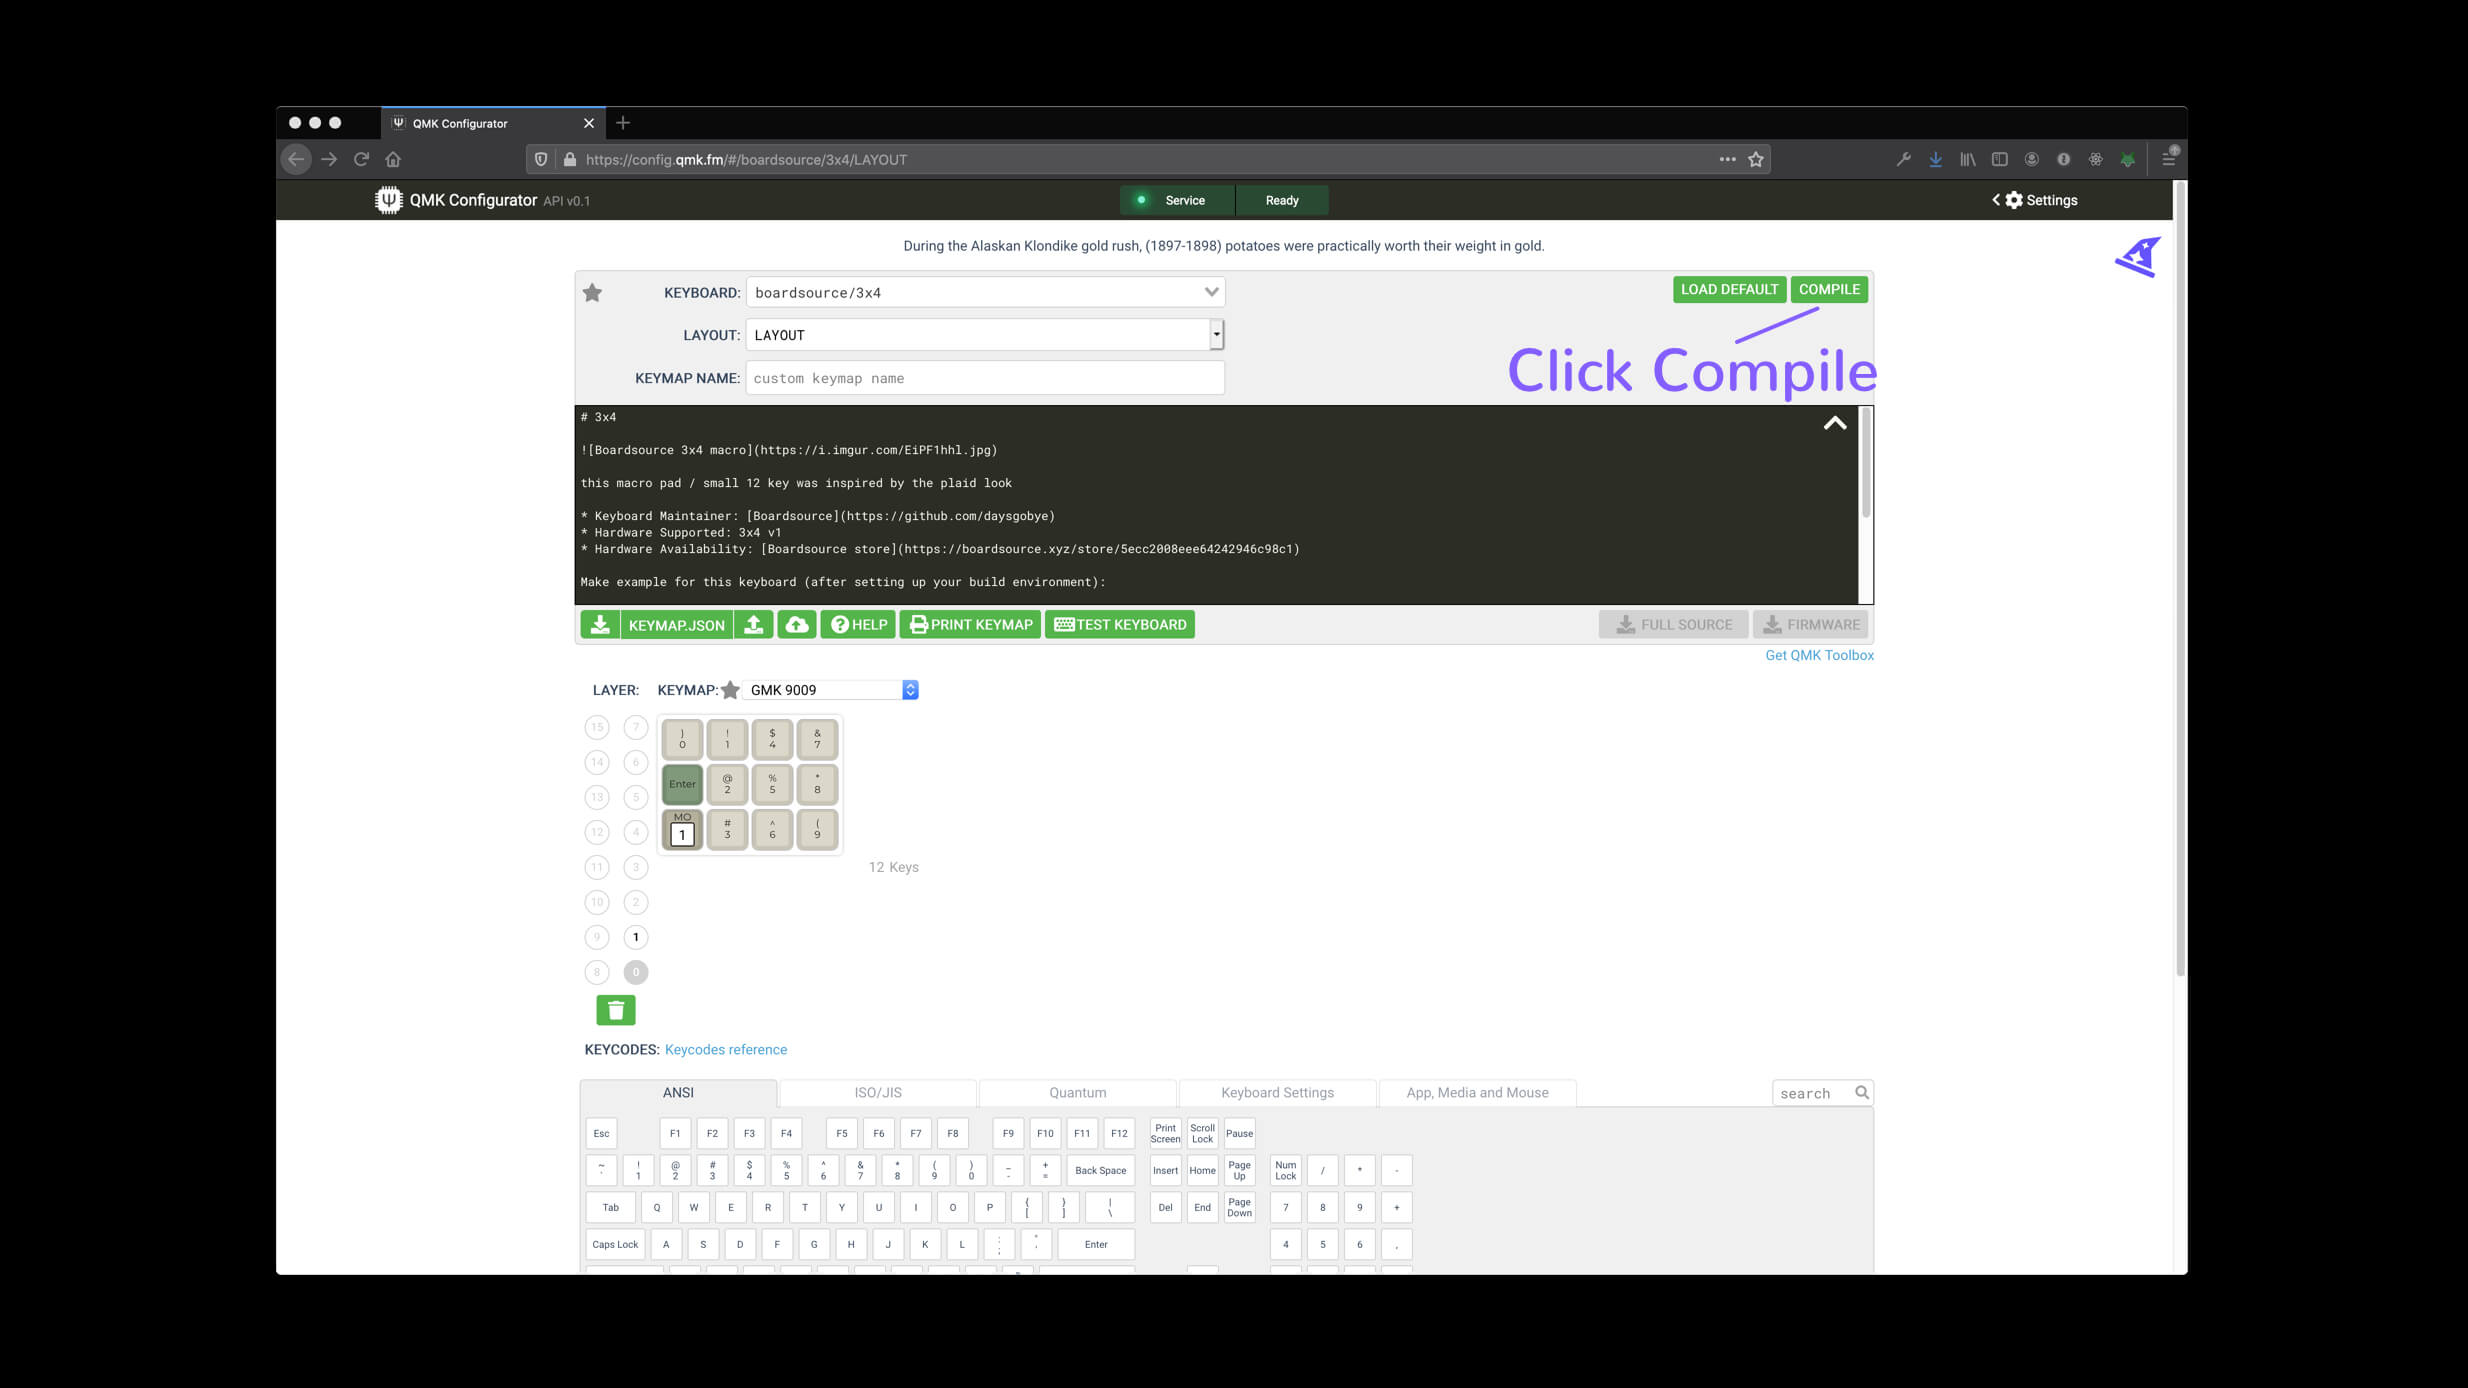
Here is what the page will look like after you make your selection (although the preview of the keyboard layout should of course look like the keyboard you’re attempting to flash).
PHOTO OF 3_SELECTION
Step 2: Compile Your Keymap And Download Firmware
For the purpose of this guide we are using the default Keymap provided in the Configurator, which every single keyboard in QMK has. However, feel free to make any changes you want to the Keymap prior to Compiling.
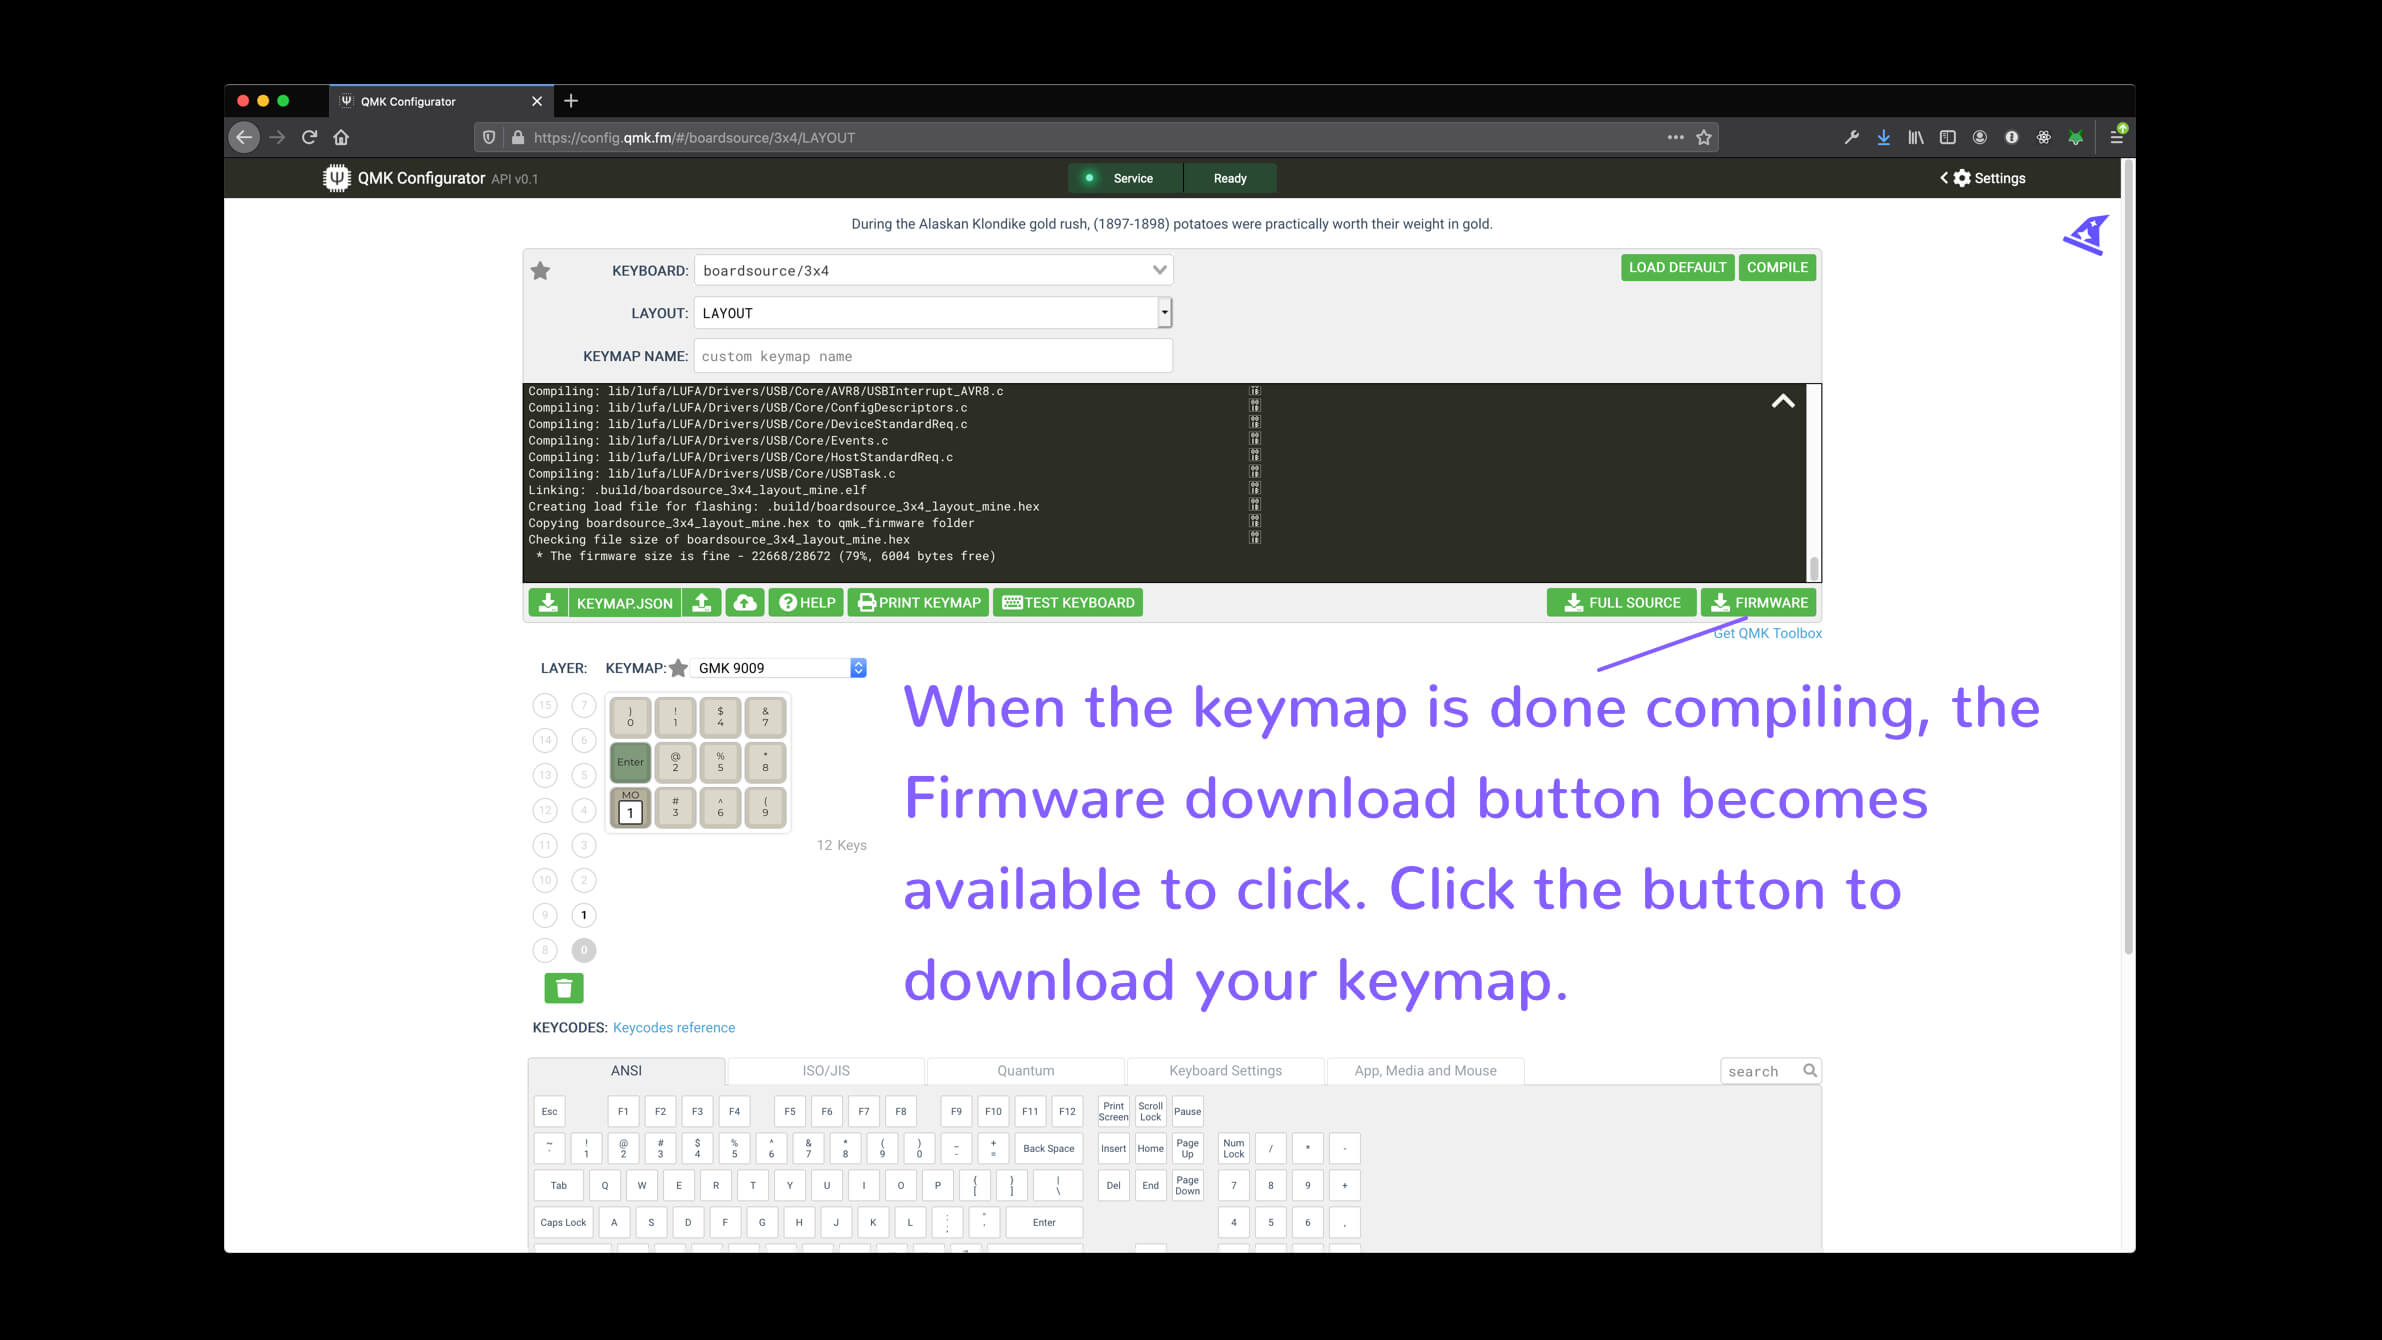
After you are satisfied with your Keymap, simply hit the Compile button, and wait for the potato animation to complete. When the potato is done baking (the Keymap is done Compiling) you can click the Green “Firmware” button with a download icon next to it, and you completed .hex Keymap file will be downloaded.
After you have successfully downloaded the Keymap file (.hex), you are officially done in the QMK Configurator, and the rest of the process is completed within the QMK Toolbox.

Step 3: Flash Your Keyboard
With the completed Keymap produced by QMK Configurator ready to go, we can move on to the next step and use the QMK Toolbox. If you don’t have that installed yet, head over to QMK Firmware - QMK Toolbox and download the software.
QMK Toolbox allows us to flash the Keymap onto our keyboard, and it is very easy to do so using the Toolbox.
Open QMK Toolbox
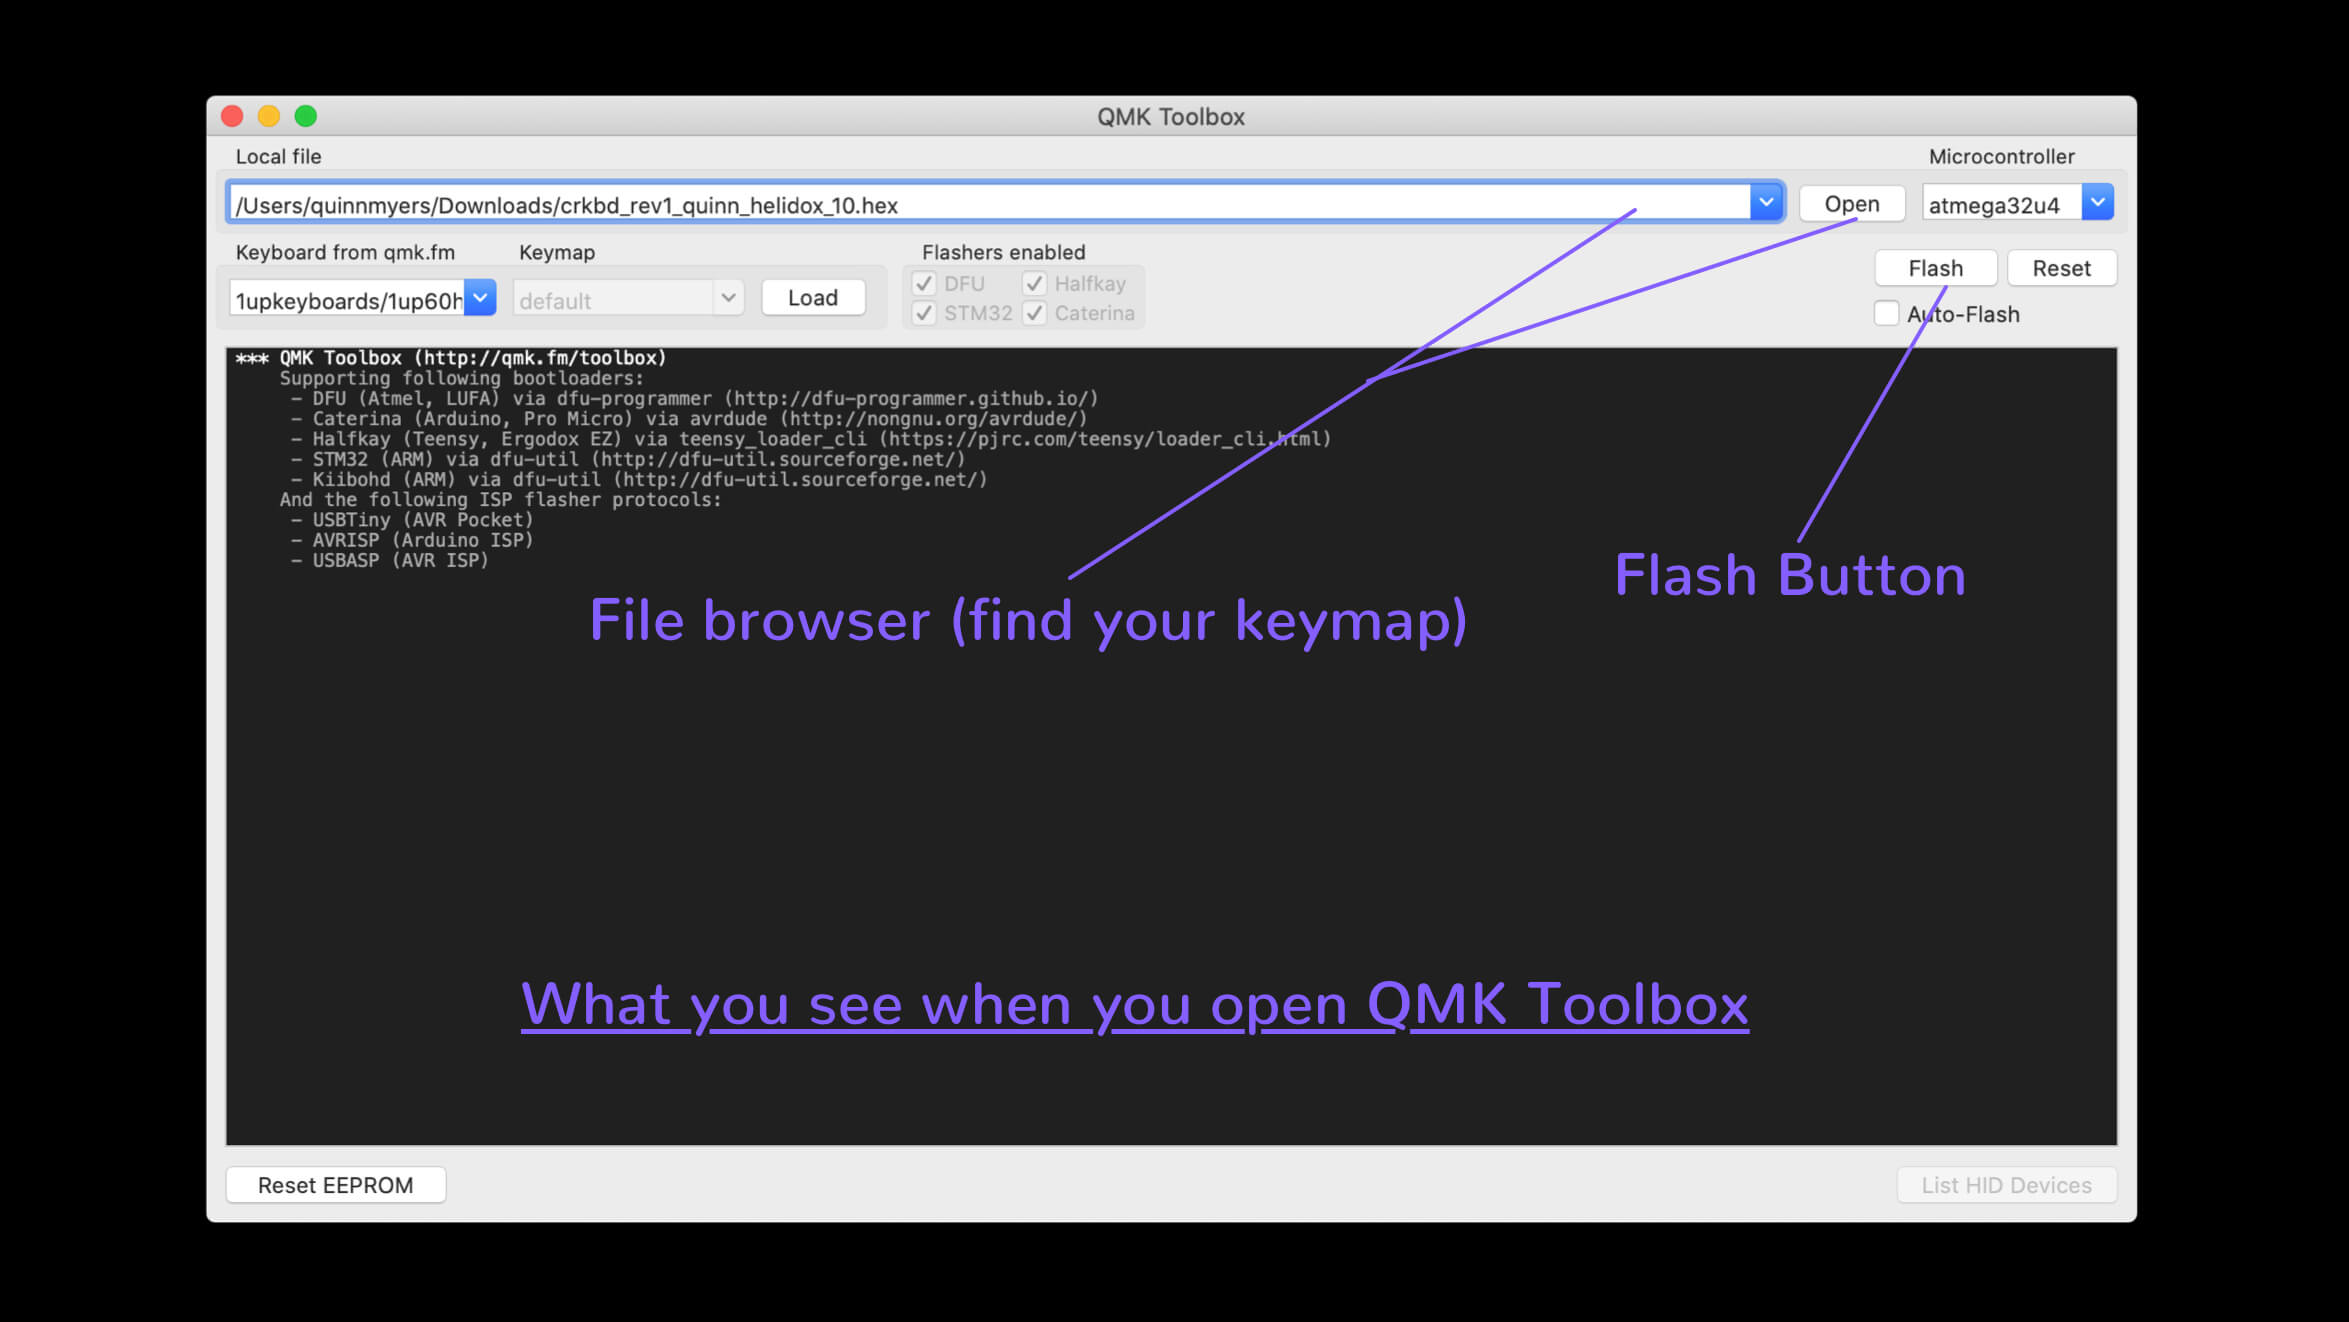
Open QMK Toolbox, you should see something similar to this:
Connect Device to QMK Toolbox:
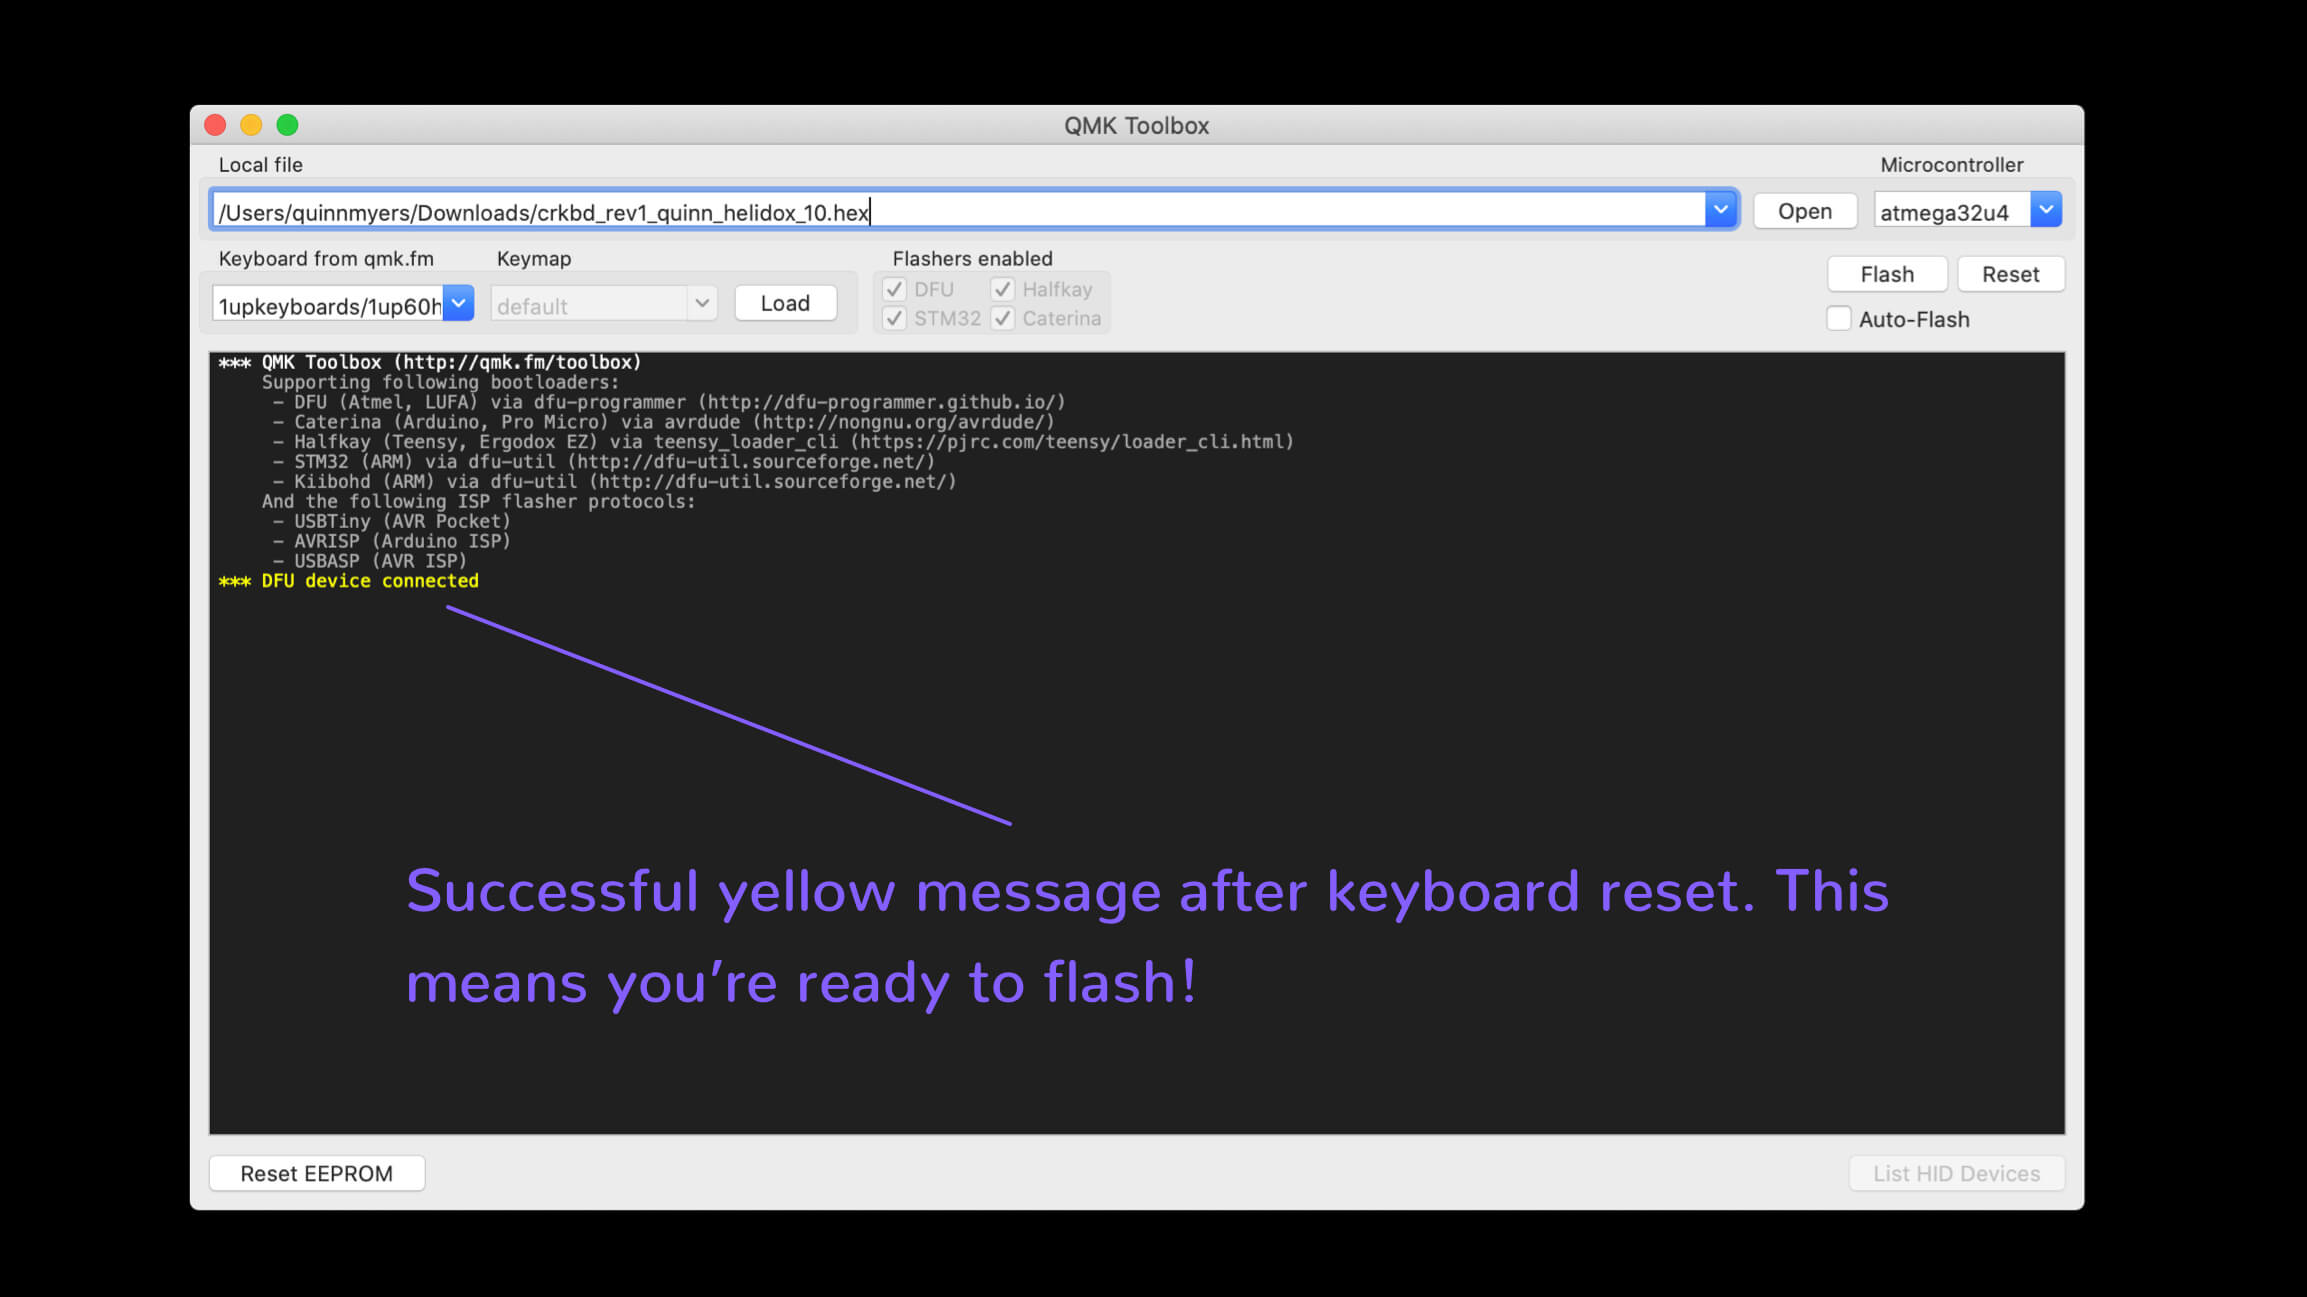
In order to flash the keyboard, we have to make QMK Toolbox recognize the device as something it can flash. In order to do, we must have QMK Toolbox open and then press the reset button on our keyboard while it is plugged in. If you’re using an Elite-C you can use the on-board reset button, if your keyboard kit has a reset switch included that you installed, simply press that reset switch. If you need help figuring out how to reset your keyboard, just ask us in Discord.
If you successfully reset your keyboard while it is plugged in with QMK Toolbox open, you should see this message in the photo below, written in yellow. If you see that message, you’re good to move on to the next step and you’re almost done!
Flash Keyboard
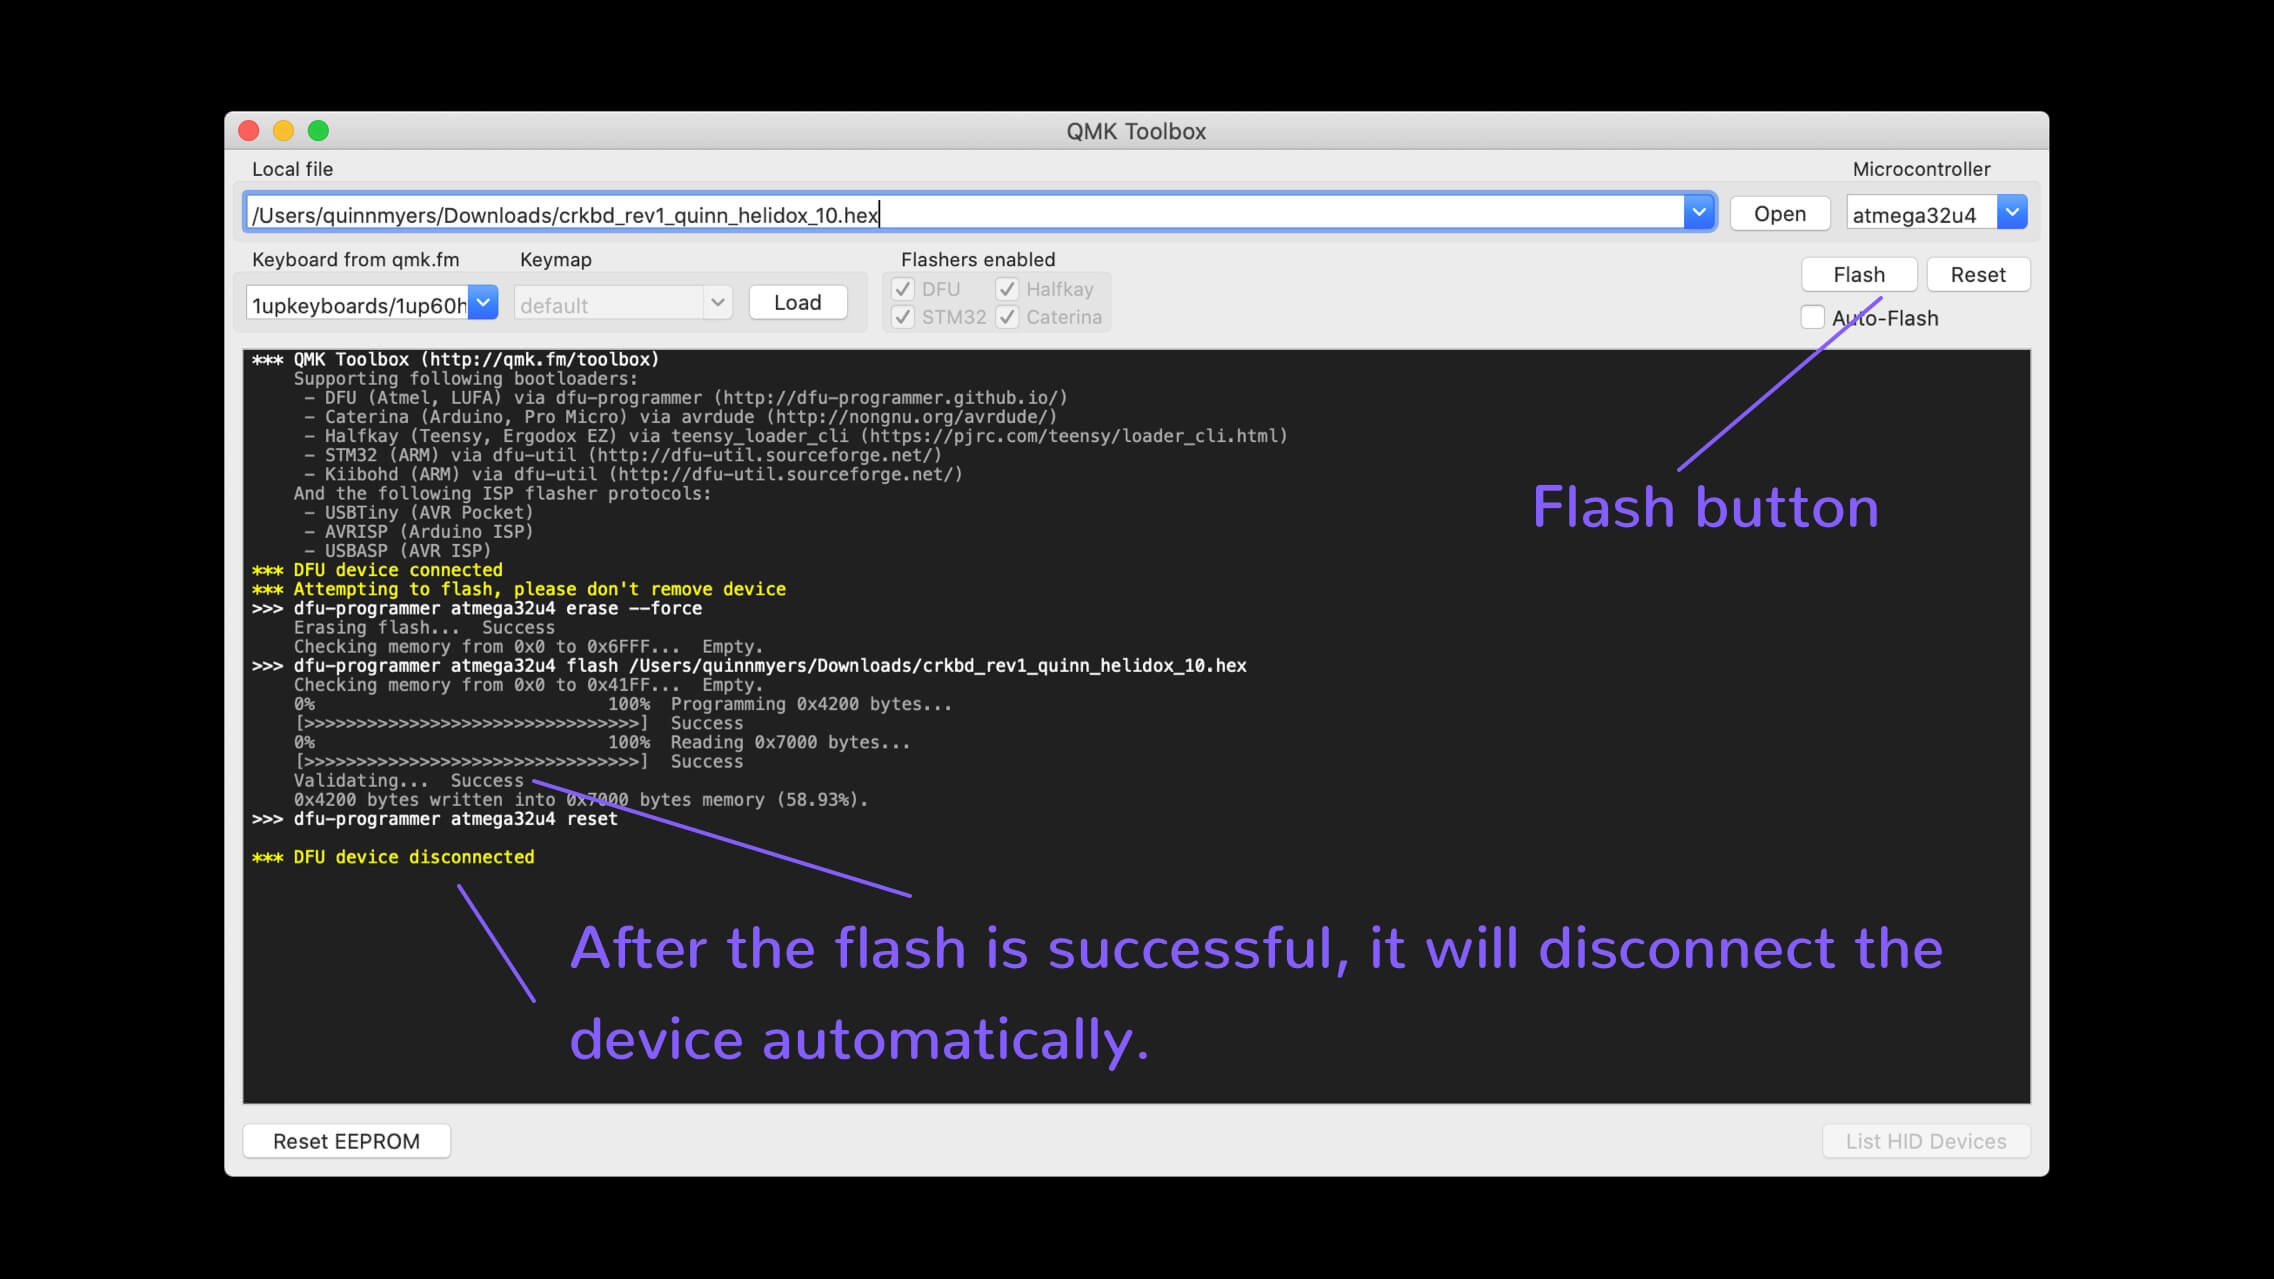
With your keyboard successfully reset and QMK recognizing it as a device it can flash, you’re ready to flash your Keymap! Using the file browser in QMK Toolbox navigate to the location you saved your Keymap (.hex file) earlier that QMK Configurator gave you. After you have the correct Keymap selected, you may click “Flash” in QMK Toolbox. If successful, it will read “DFU Device Disconnected,” because QMK Toolbox automatically disconnects your device after a successful flash, and a few lines above that you should see the work ‘success.’ If you are flashing a split keyboard, simply plug in your other half, reset it, and flash the same Keymap to that half. If you are flashing a non-split board, you’re done!
All Done
There you go, now you've successfully flashed a keyboard using QMK Configurator to build your map, and QMK Toolbox to flash the keymap onto your keyboard. If your keyboard is built properly, this should be a very smooth process. Now that you know the easy steps to follow to flash you keyboard, you can spend some time making the perfect keymap for yourself.
Related Products


Copyright ©2025, Boardsource. All Rights Reserved.